
-
Install Mind Marshal
Download the universal disk image, open it, and drag Mind Marshal into your Applications folder. The build is signed with a Developer ID and notarized by Apple, so it opens with an ordinary double-click. There is no right-click workaround and no security warning to dismiss.
One download runs natively on both Apple Silicon and Intel Macs, and requires macOS 10.15 Catalina or later.
On Windows, download version 0.1.24 and run the
.exeinstaller from the official download page. The installer is Authenticode signed and timestamped for publisher Thomas Whiteford. Confirm that publisher in the Windows security prompt before continuing.The genuine 0.1.24 installer SHA-256 is
ed2a5073103027622f6e5b260e87268681c3fbdf3098536e38ddc004a1b07fa7. Microsoft Defender scanned every packaged artifact clean, the updater signature was verified, and both clean installation and in-app upgrade preserved the local workspace.Updating on Windows works through the signed in-app updater or the installer. It upgrades in place, and your workspace lives outside the install folder, so the workspace is retained.
Nothing to sign up for. There is no product account, no email verification, and no cloud workspace. The app is fully usable the moment it opens. -
Answer one question at first run
A short setup wizard asks what you want the workspace for. Your answer shapes a starting structure: a Projects database, a Journal, and a personalized Welcome page with a few starter tasks.
If you would rather start from nothing, skip the wizard. You can create the same structures later from the New menu or the template Library.
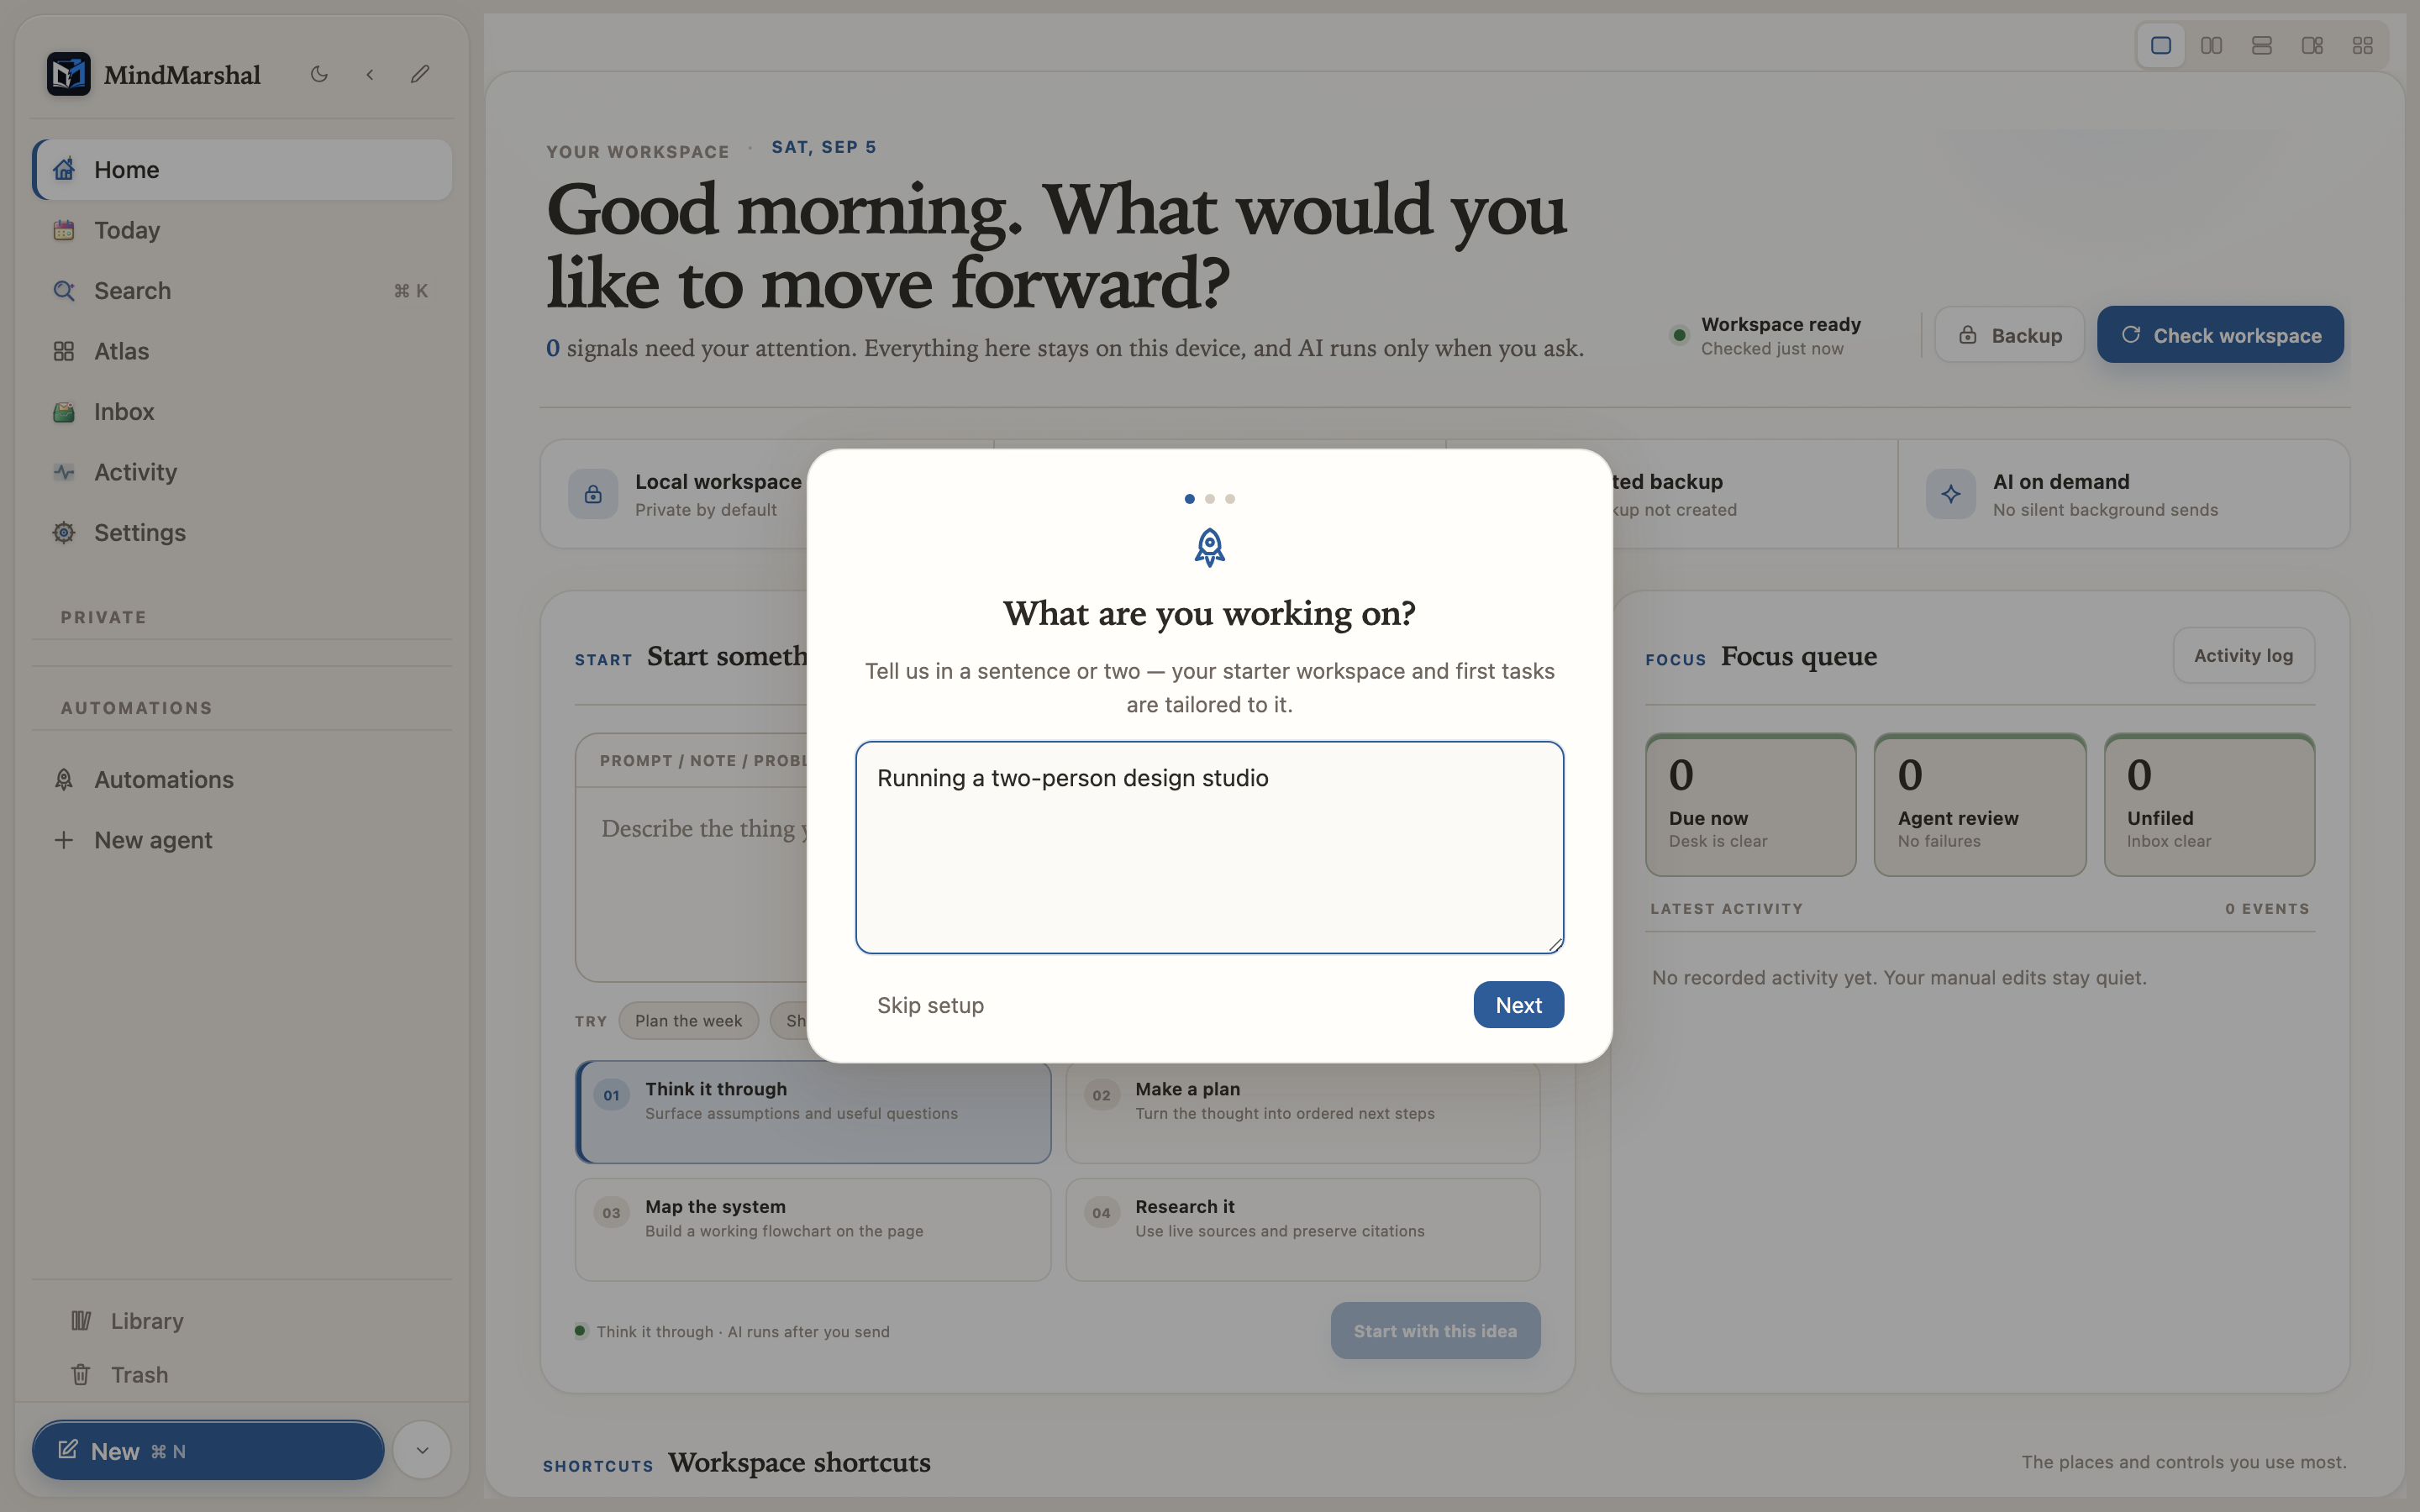
First-run setupThree steps, under a minute, and it can be skipped entirely. -
Write your first page
Press ⌘ N for a new page and start typing. Press / anywhere to open the block menu for headings, lists, to-dos, quotes, code, dividers, images and charts. Drag any block by its handle to reorder it.
Type [[ followed by a page name to link two pages together. A Related row at the bottom of the page suggests other pages with overlapping content, so your notes start finding each other.
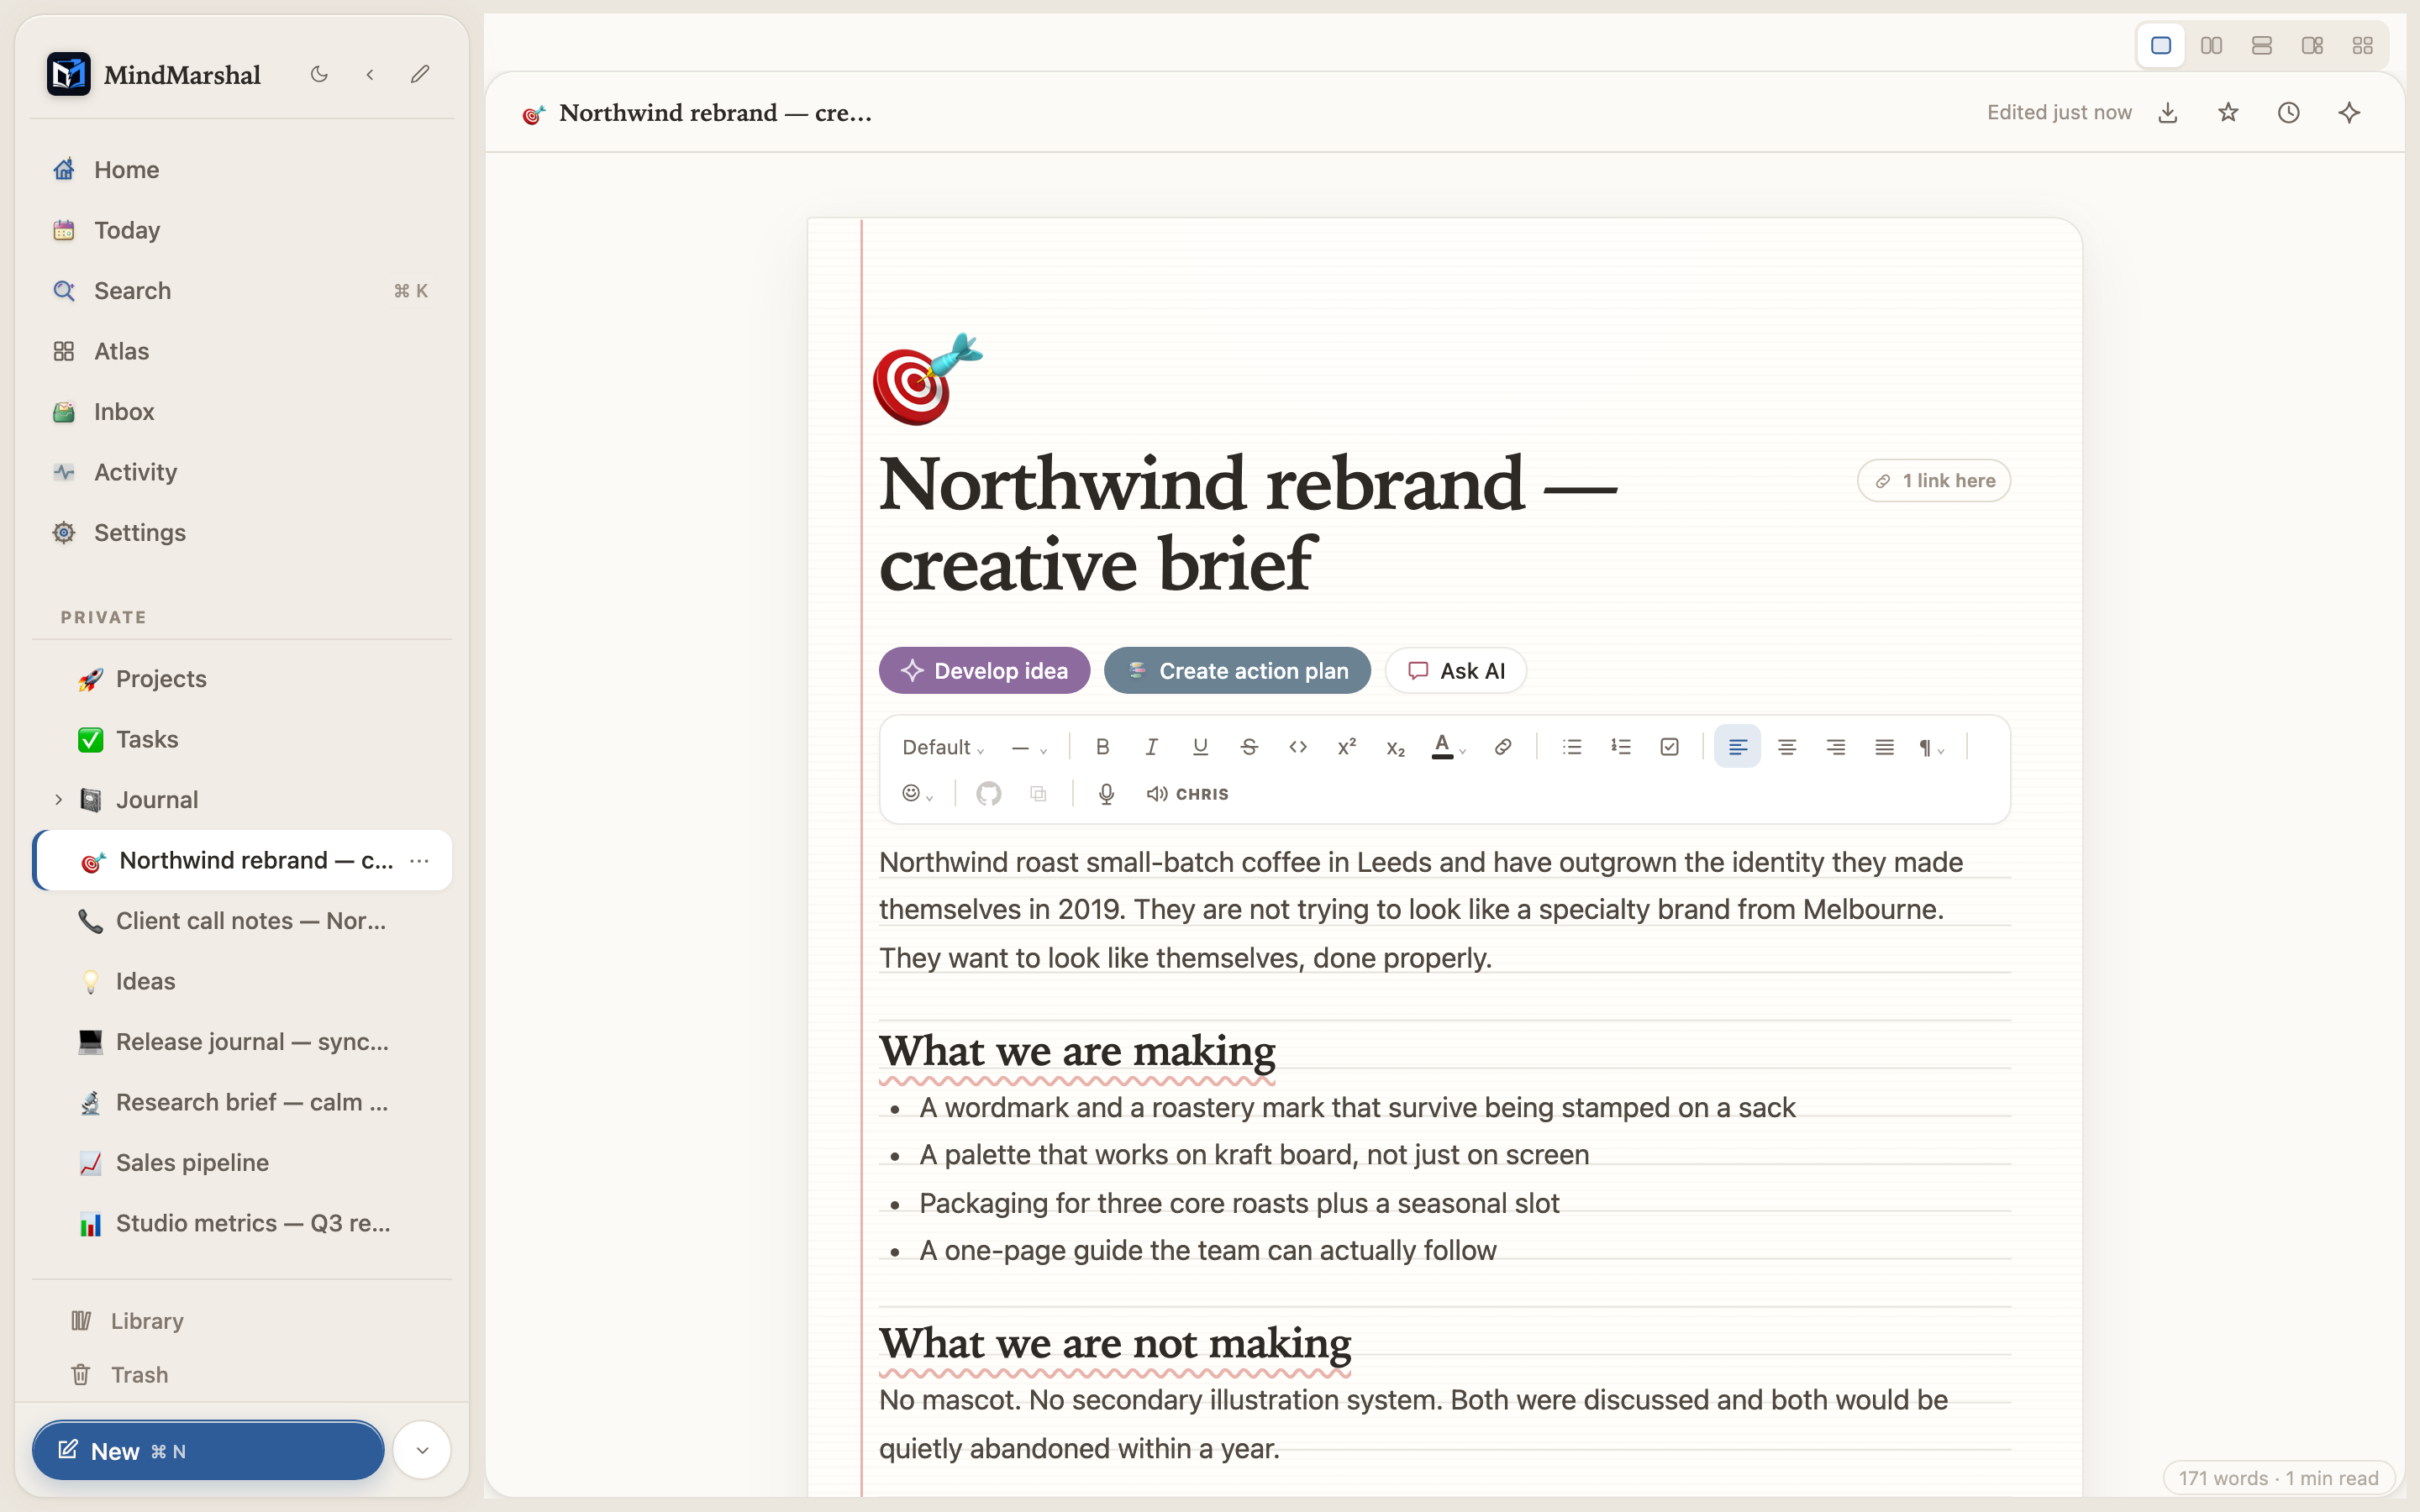
The block editorRich text, slash commands, and drag-to-reorder blocks. -
Capture things before you lose them
Press ⌘ ⇧ I to open the Inbox and type a thought. It is stored unfiled, with a badge showing how many items are waiting, so nothing has to be organized at the moment you think of it.
When you are ready, file items by hand, or use Organize inbox to have the assistant sort them into Tasks, Projects, Journal or Ideas. Every filing has its own undo, so an unwanted suggestion costs you one click.
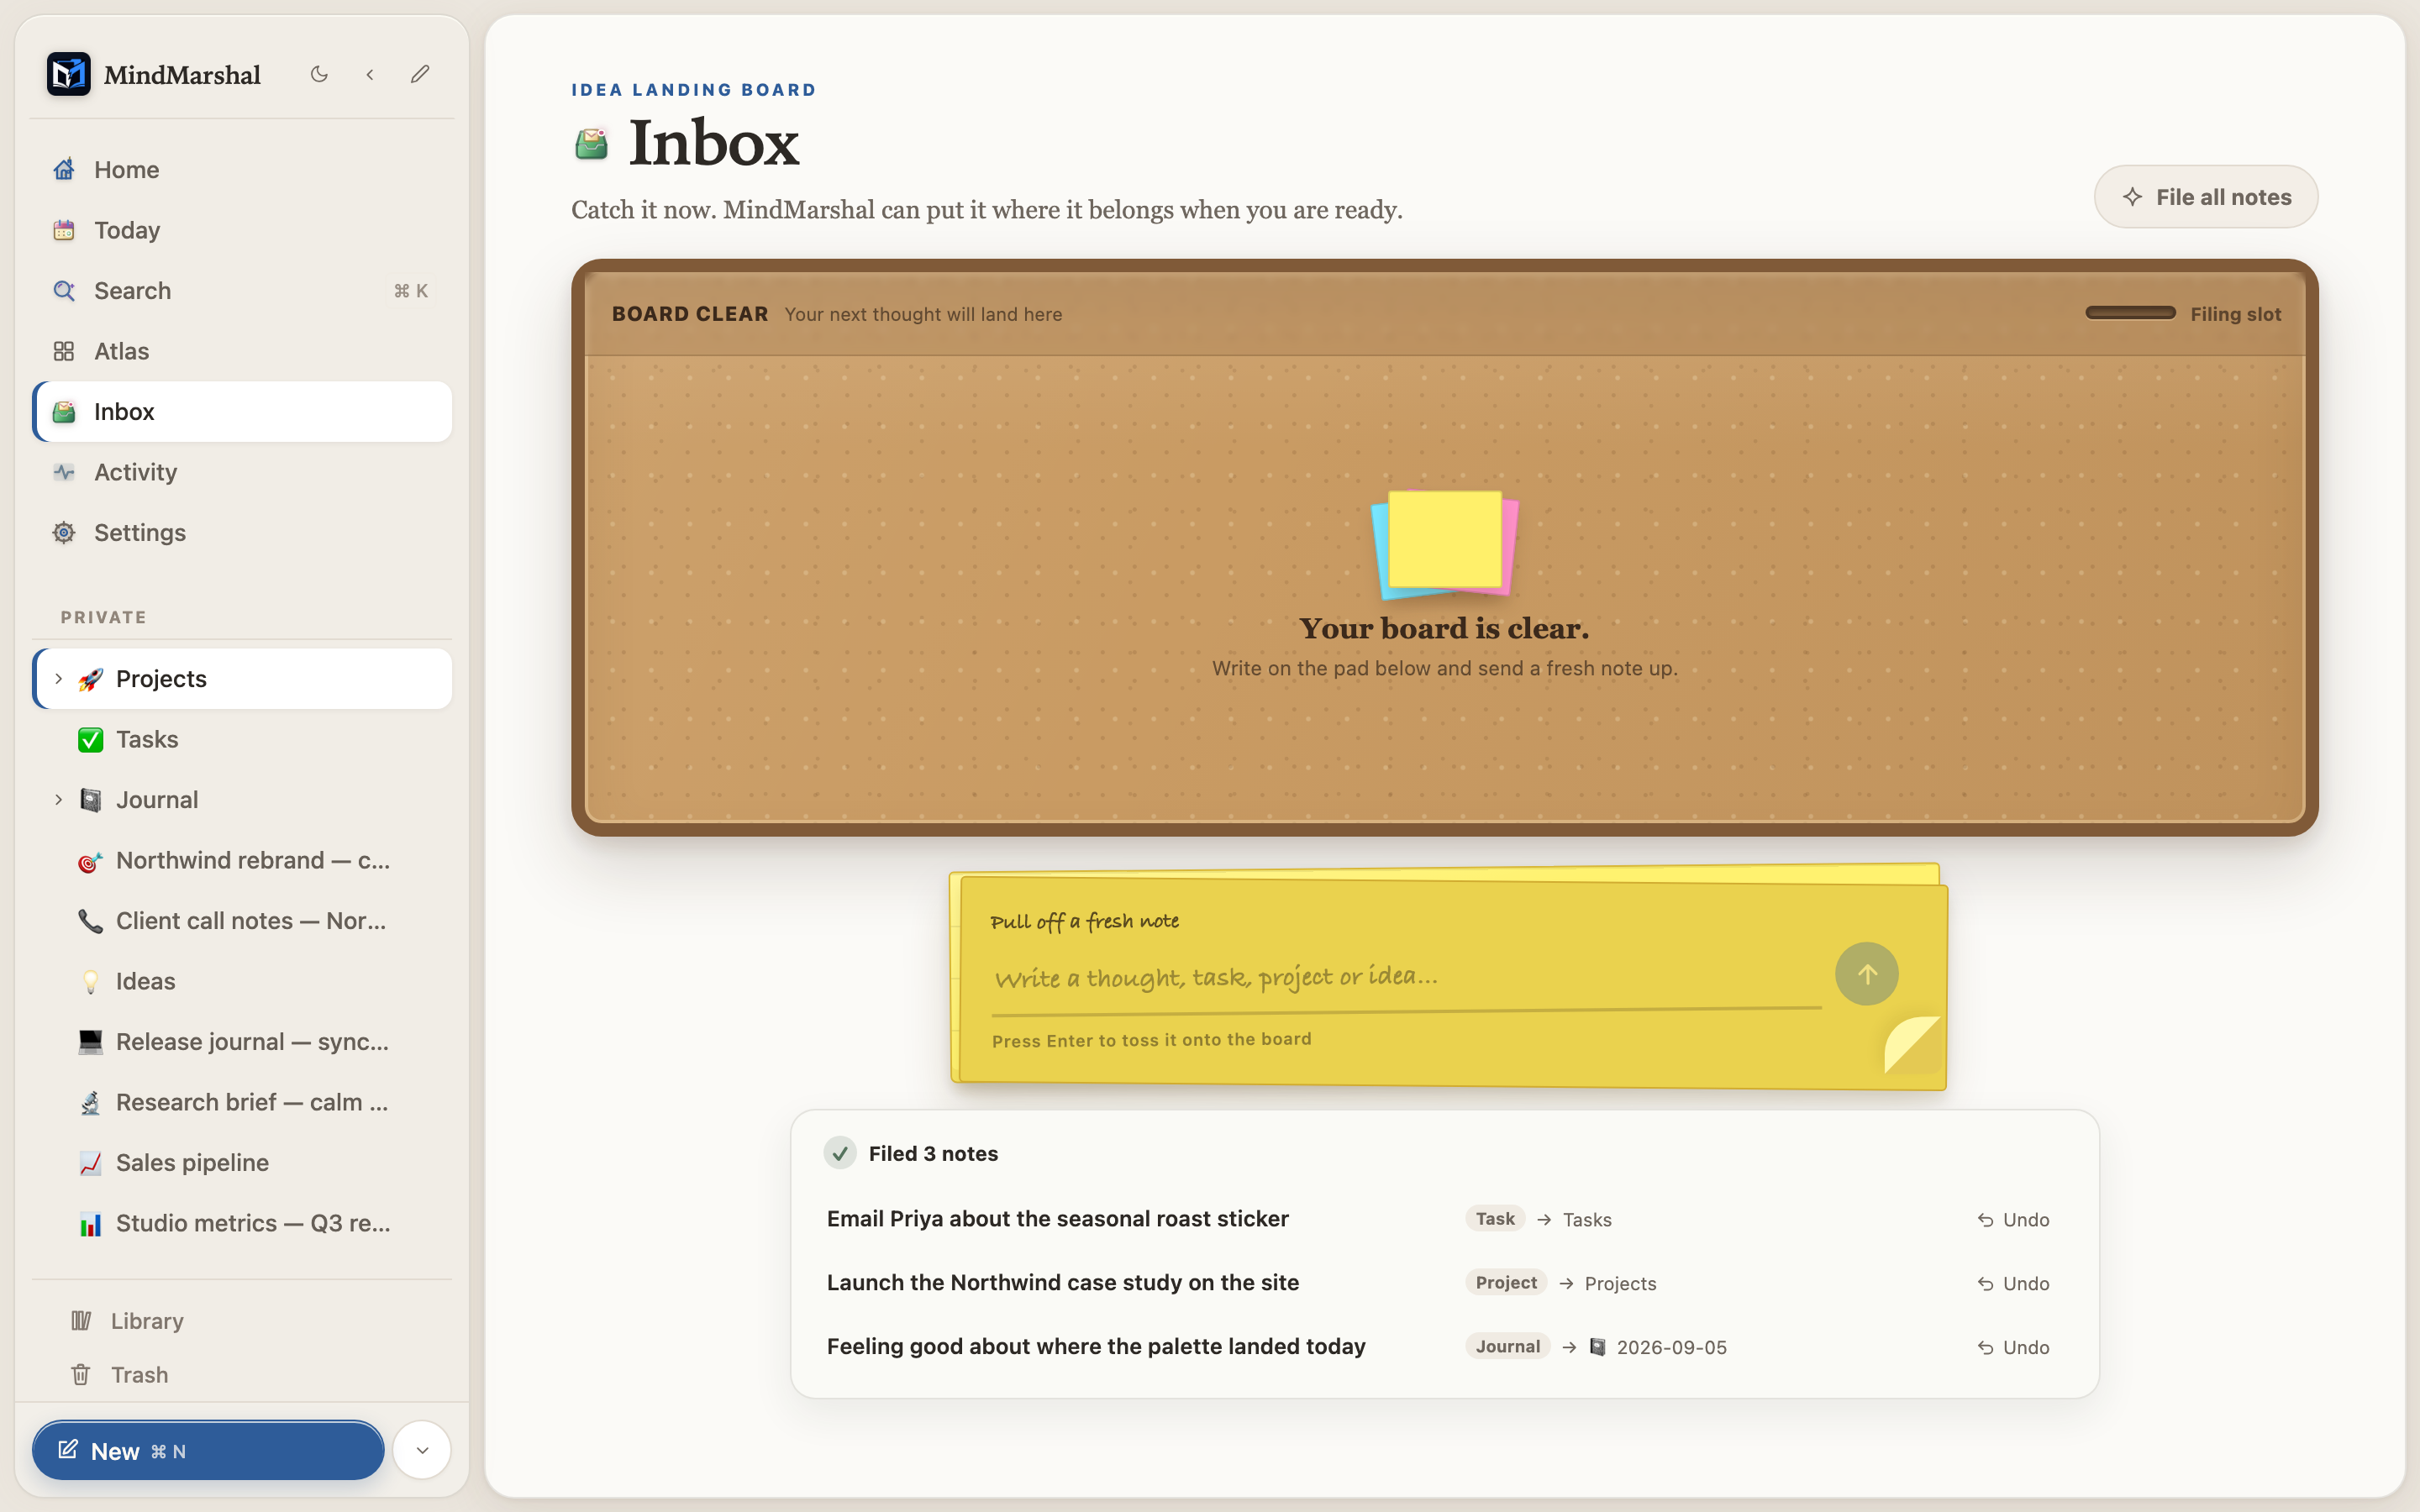
InboxQuick capture now, decisions later. Tip: press ⌘ K at any time to search every page and block, or to run an action such as creating a page, opening today’s note, or switching the theme. -
Turn an Inbox idea into a guided project
Open an Inbox capture and choose Promote to project. Mind Marshal creates the project work without deleting the original thought, so its source and wording remain available. Promotion is atomic, safe to retry, and has an exact undo.
A project moves through five derived stages: Captured, Shaped, Planned, In motion, and Realised. Choose Guide me when you want one focused next action at a time, or leave it off and work freely. Home can keep up to three unfinished guided projects in Continue your journey.
CapturedThe original idea is preserved.ShapedClarify the outcome and boundaries.PlannedReview a proposed action plan first.In motionWork one useful next action.RealisedClose with a record of the result.On a project page, Create action plan shows a proposal before it writes anything. Discarding the proposal changes nothing. Accept only the tasks you want, then create the plan and use the Activity entry if you need to undo it.
Project pageShape the brief, preview an action plan, or keep working manually. -
Give a project the view it needs
A database is a set of rows with typed properties: text, number, select, multi-select, date, checkbox and URL. Every row opens as a full page, so a task can hold real notes rather than just a title.
Switch between Table, Board, Timeline, Calendar, List and Gallery using the tabs. These are six windows onto the same data, not six copies, so a card you move on the board also moves everywhere else.
A board can group cards by one select property and use a second select property for sections or swimlanes. Dragging a card can update its stage, section, and order in one move. If a section value disappears, its cards remain available in No section rather than becoming hidden.
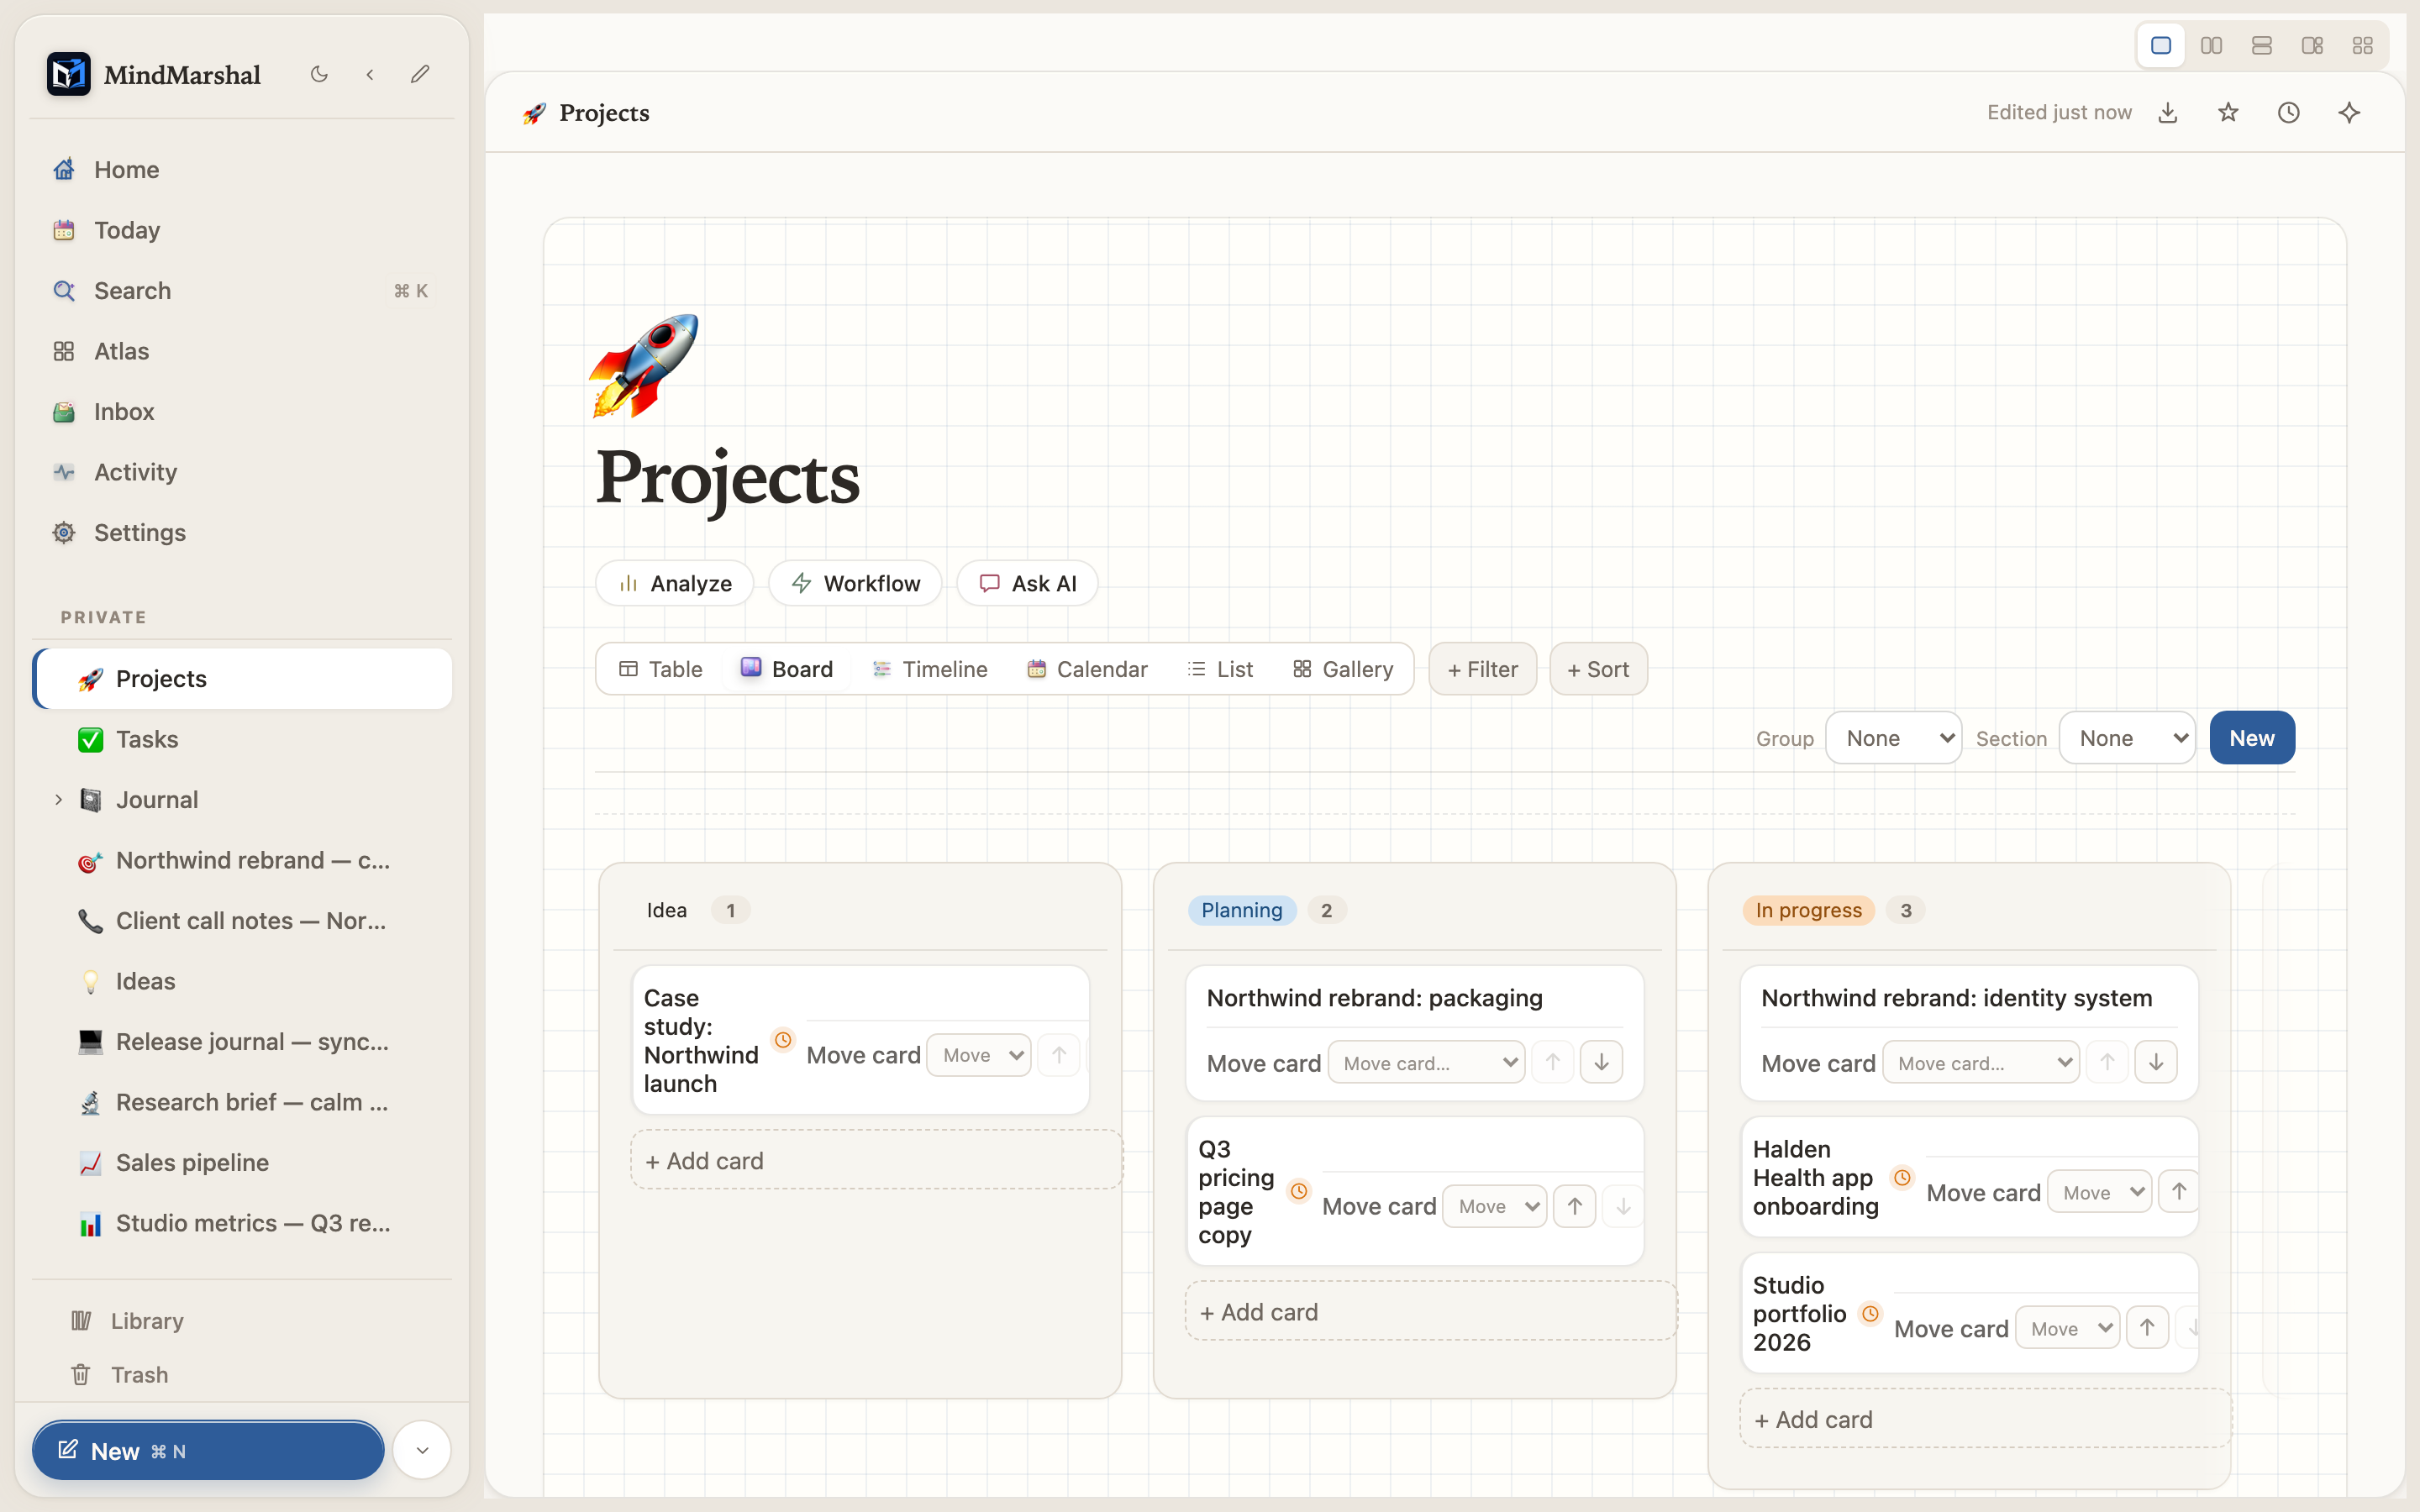
Board viewA card that has sat too long in one stage is flagged, so quiet work does not stay invisible. Add Start and End date properties and the timeline draws bars automatically. Add any date property and the calendar fills itself in.
-
Review today and the week
Today in the sidebar opens today’s journal page, creating it if it does not exist yet. It recaps what you captured, what you completed, and anything an agent did for you.
From Home, choose Review today to move through dated or reminded items one at a time. Choose Review the week for Inbox captures and the next seven days. Each item can stay unchanged, be completed, be rescheduled, or be opened in context. Nothing is bulk-changed behind the dialog.
On macOS, the Home view can also show today’s events from every calendar already configured on your Mac, including iCloud, Google, Outlook and Exchange accounts. Choose Show my calendar and macOS will ask your permission. This uses the system calendar store, so there is no sign-in, no OAuth, and no calendar data leaves your Mac. Calendar display is the one feature that is macOS-only today; everything else in this guide works the same on Windows.
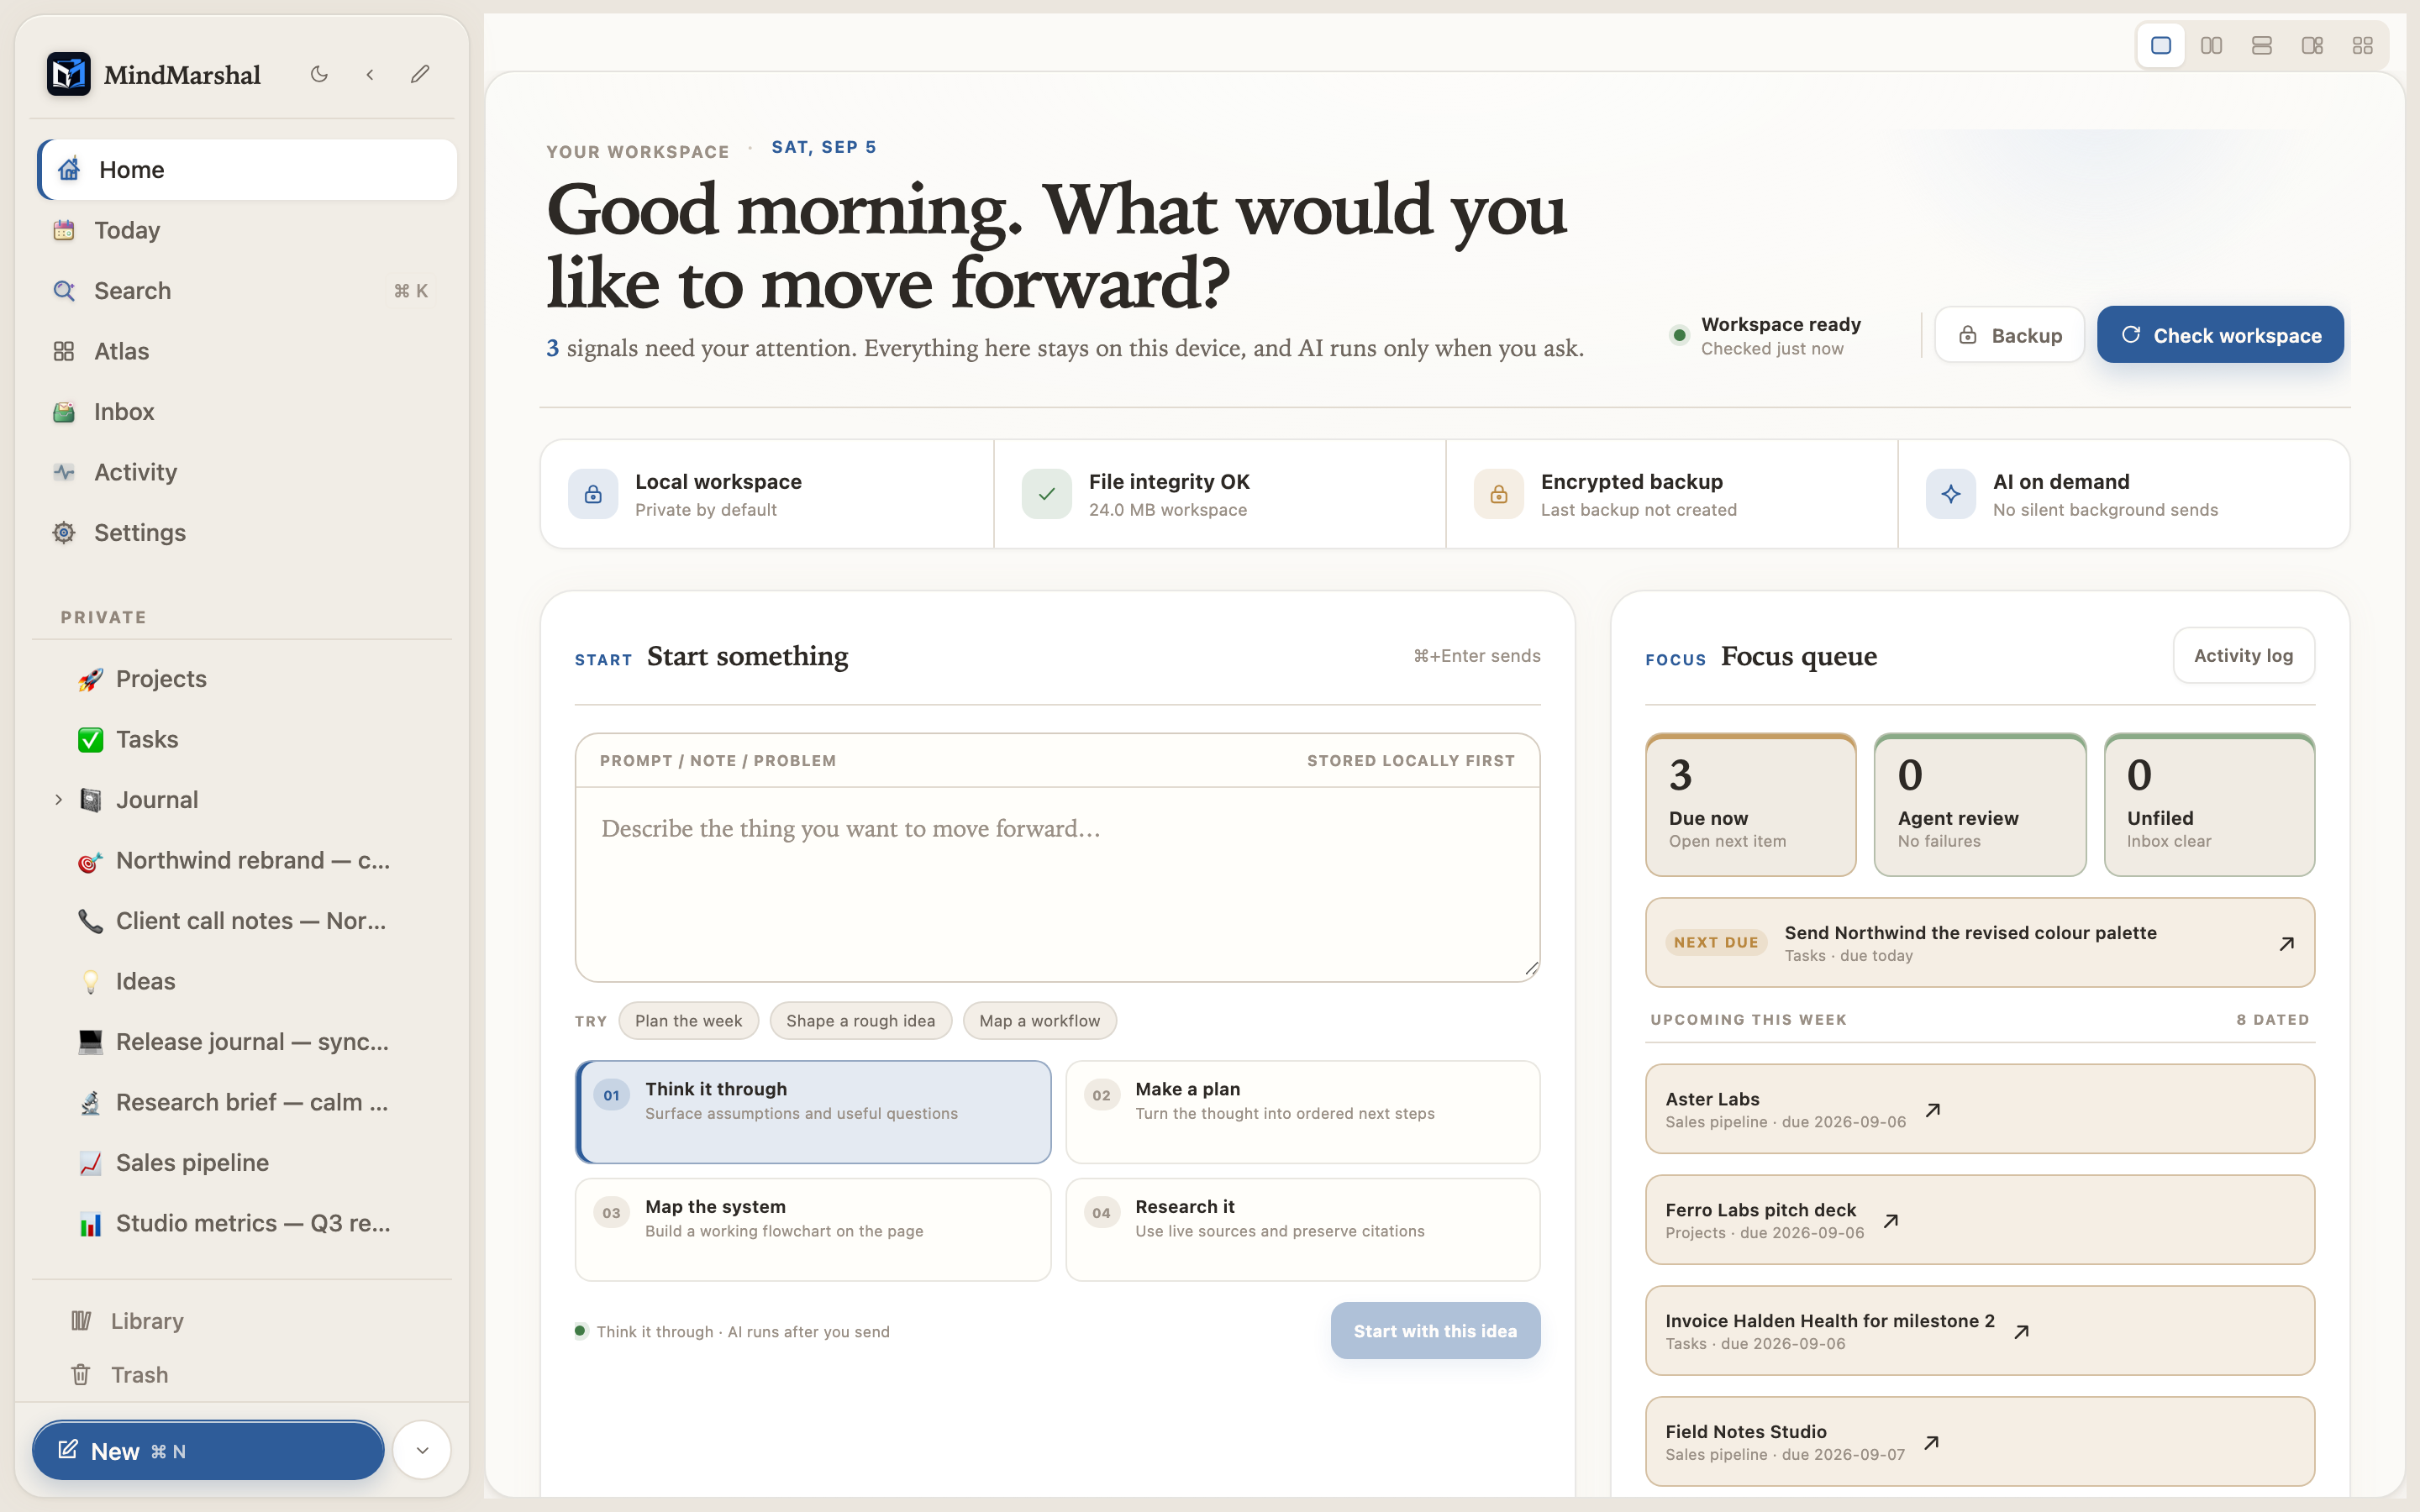
HomeThe day gathered in one place, before you open anything else. -
Dictate and listen without connecting AI
In the page formatting toolbar, press Dictate to request microphone access and transcribe locally with the speech recognizer installed on your computer. On macOS, the recording is processed on-device and discarded after transcription. Denying microphone permission leaves the editor fully usable.
Read aloud is a separate control. The built-in local neural voice works offline and needs no account or API key. If you explicitly enable the optional ElevenLabs Chris voice, only the selected text, or the current page when nothing is selected, is sent after the app shows the boundary and asks for consent.
Free Core feature. Local dictation and local neural read aloud are unlimited. They are not part of the Pro AI trial and do not require a model provider. -
Connect an AI provider — only if you want one
Mind Marshal is fully usable with no AI configured. Nothing is ever sent anywhere by simply opening a page or typing. Assistance runs only when you invoke it: Ask AI on a selection, Continue writing, or a workflow whose trigger you set up yourself.
Open Settings → AI Providers and choose one of seven options.
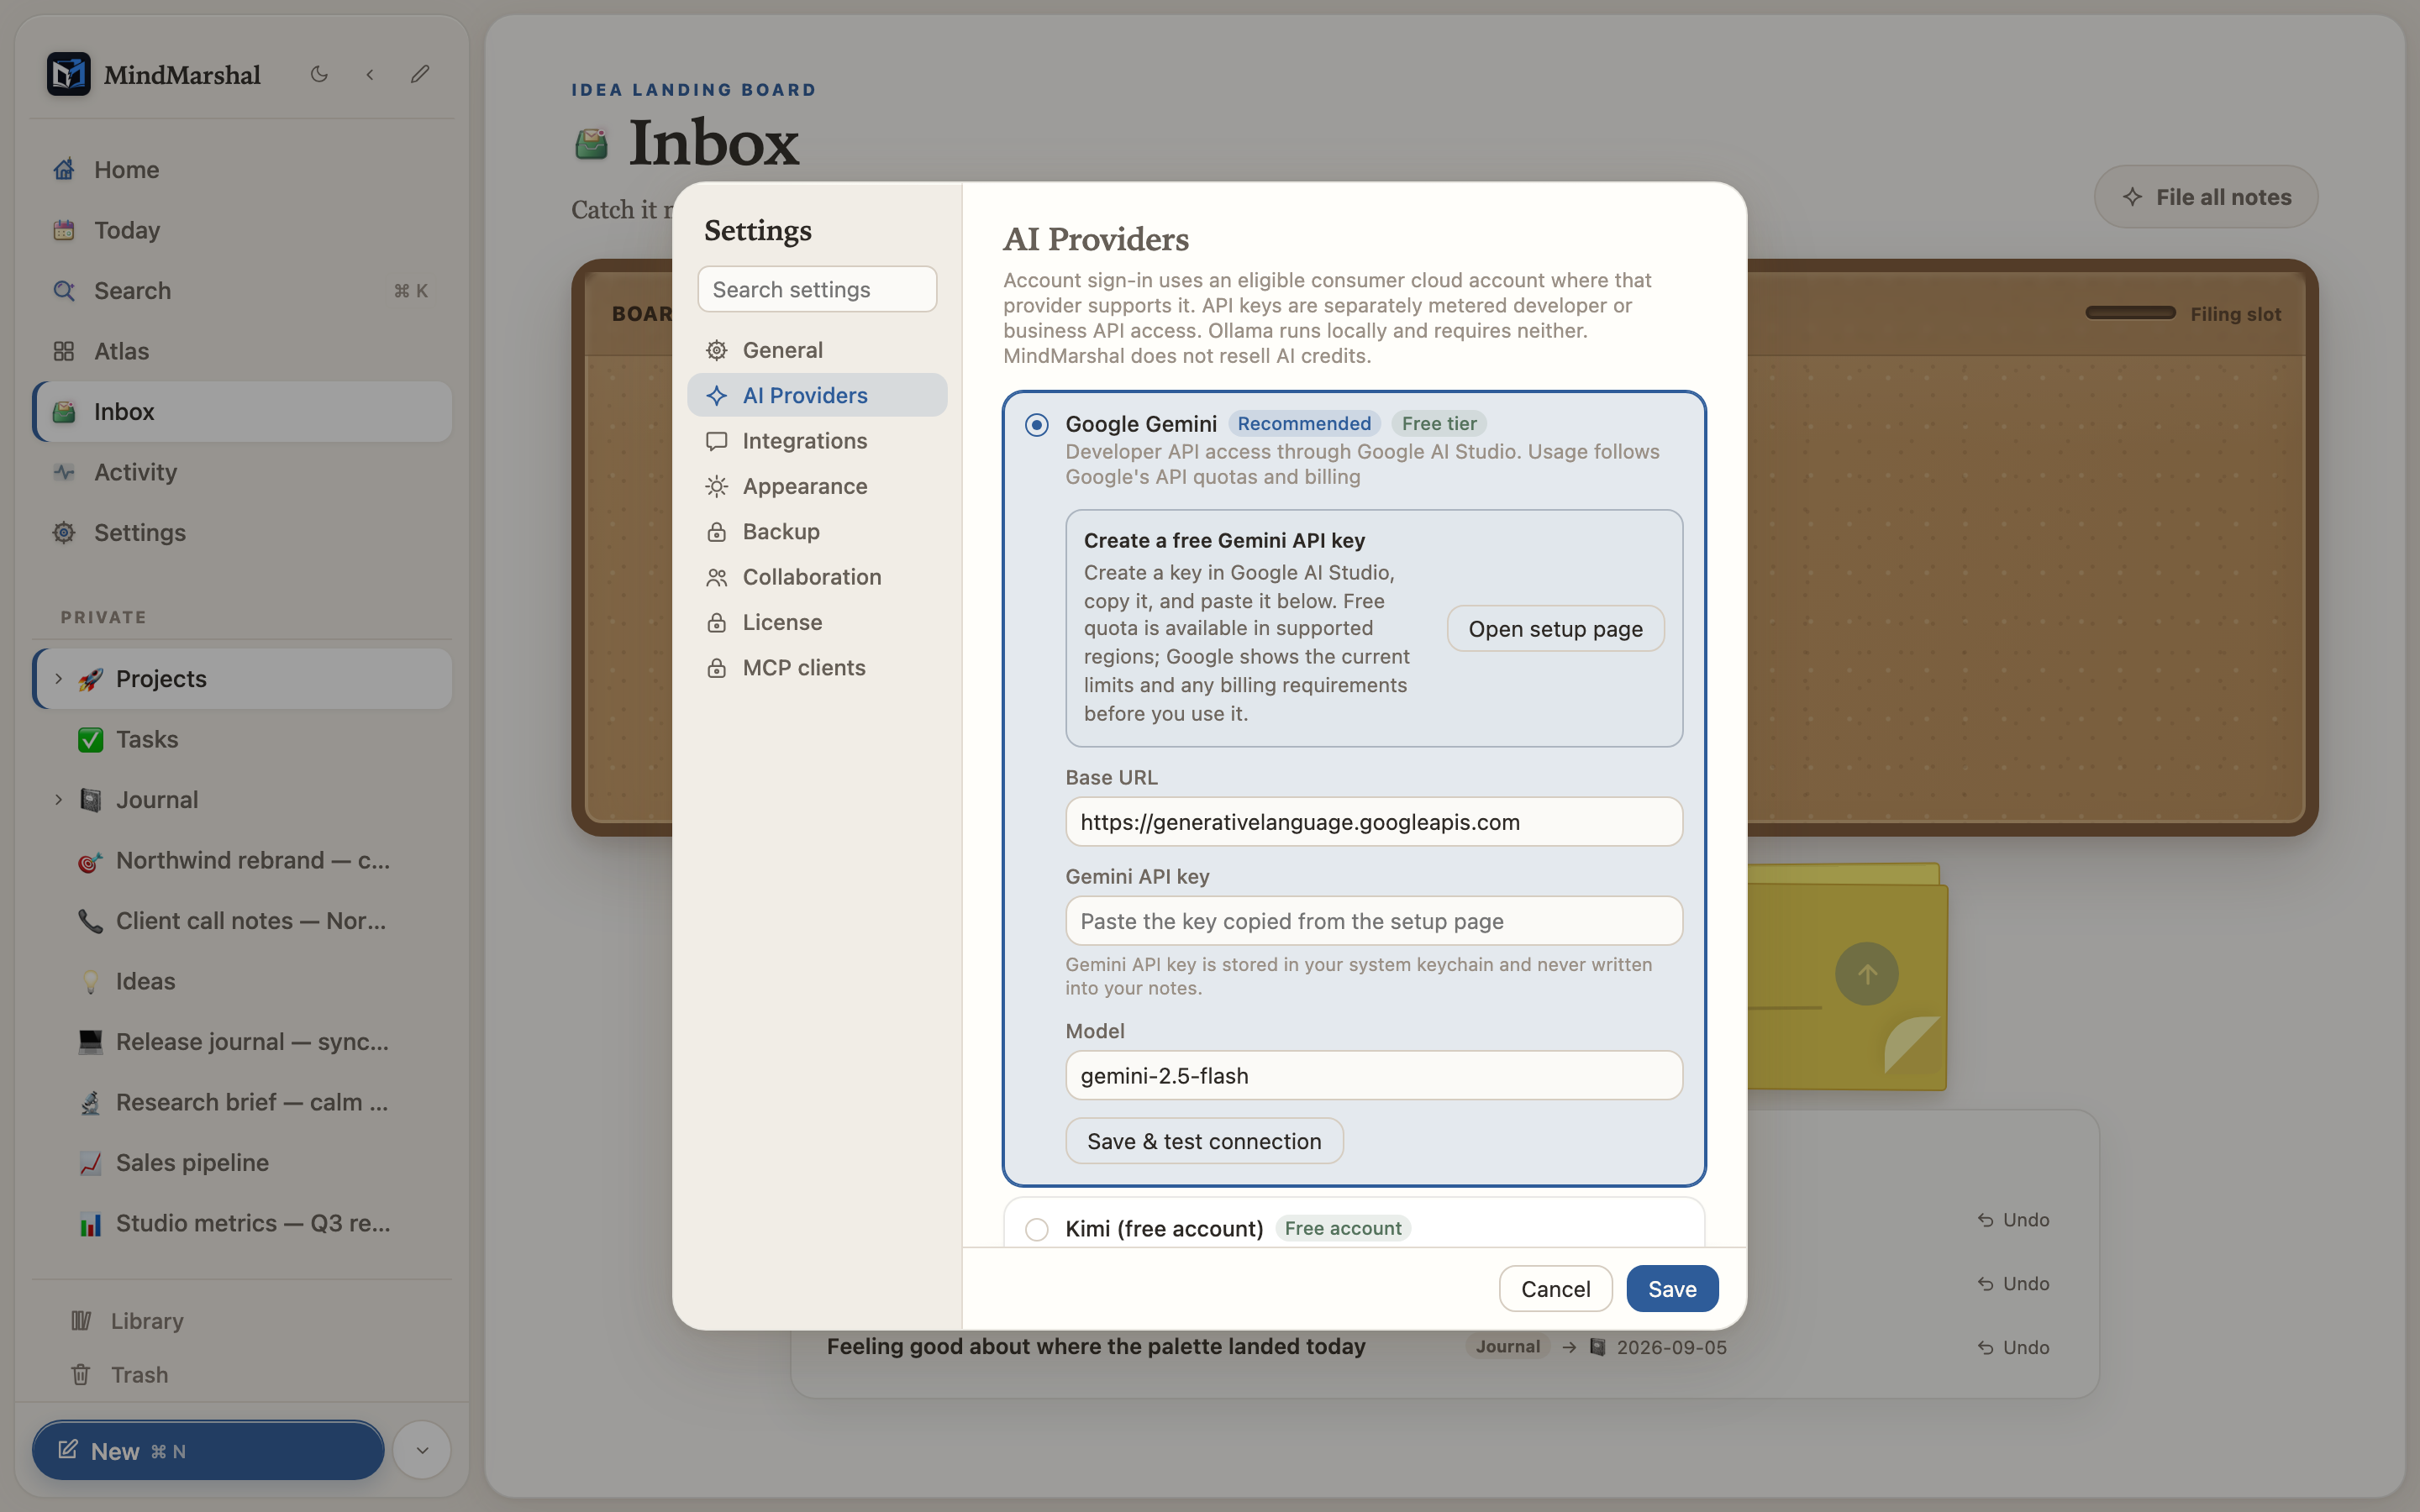
Settings → AI ProvidersPick the account or API the AI features should use. Compare all seven provider options
What each option needs from you Option What you need Good for OpenAI (ChatGPT account) Browser sign-in. No API key. You already pay for ChatGPT Plus or Pro. Claude (Pro/Max account) Browser sign-in. No API key. You already pay for Claude. Kimi (account sign-in) Approve a short code on kimi.com. You already have a Kimi account. OpenAI-compatible API Base URL, API key, model. Azure, proxies, gateways, most providers. Anthropic API key. Claude models billed per token. Google Gemini API key. Gemini models billed per token. Ollama Nothing. Runs locally. Zero cost, and nothing leaves your computer. Choose a model from the dropdown, then press Test connection before you rely on it. Keys and sign-in tokens are stored in the macOS Keychain, never in your workspace file and never in a log.
Cost control. A daily ceiling on agent calls is enforced inside the app, so an unattended workflow cannot run up a large provider bill overnight. -
Bring Slack, Discord or GitHub into your Inbox
Capture-in is one-way: messages and assigned GitHub work are captured into your inbox without posting back. GitHub also has an editor action that can commit one code file, but only when you explicitly press Push code. Open Settings → Integrations to connect sources and choose how often they sync.
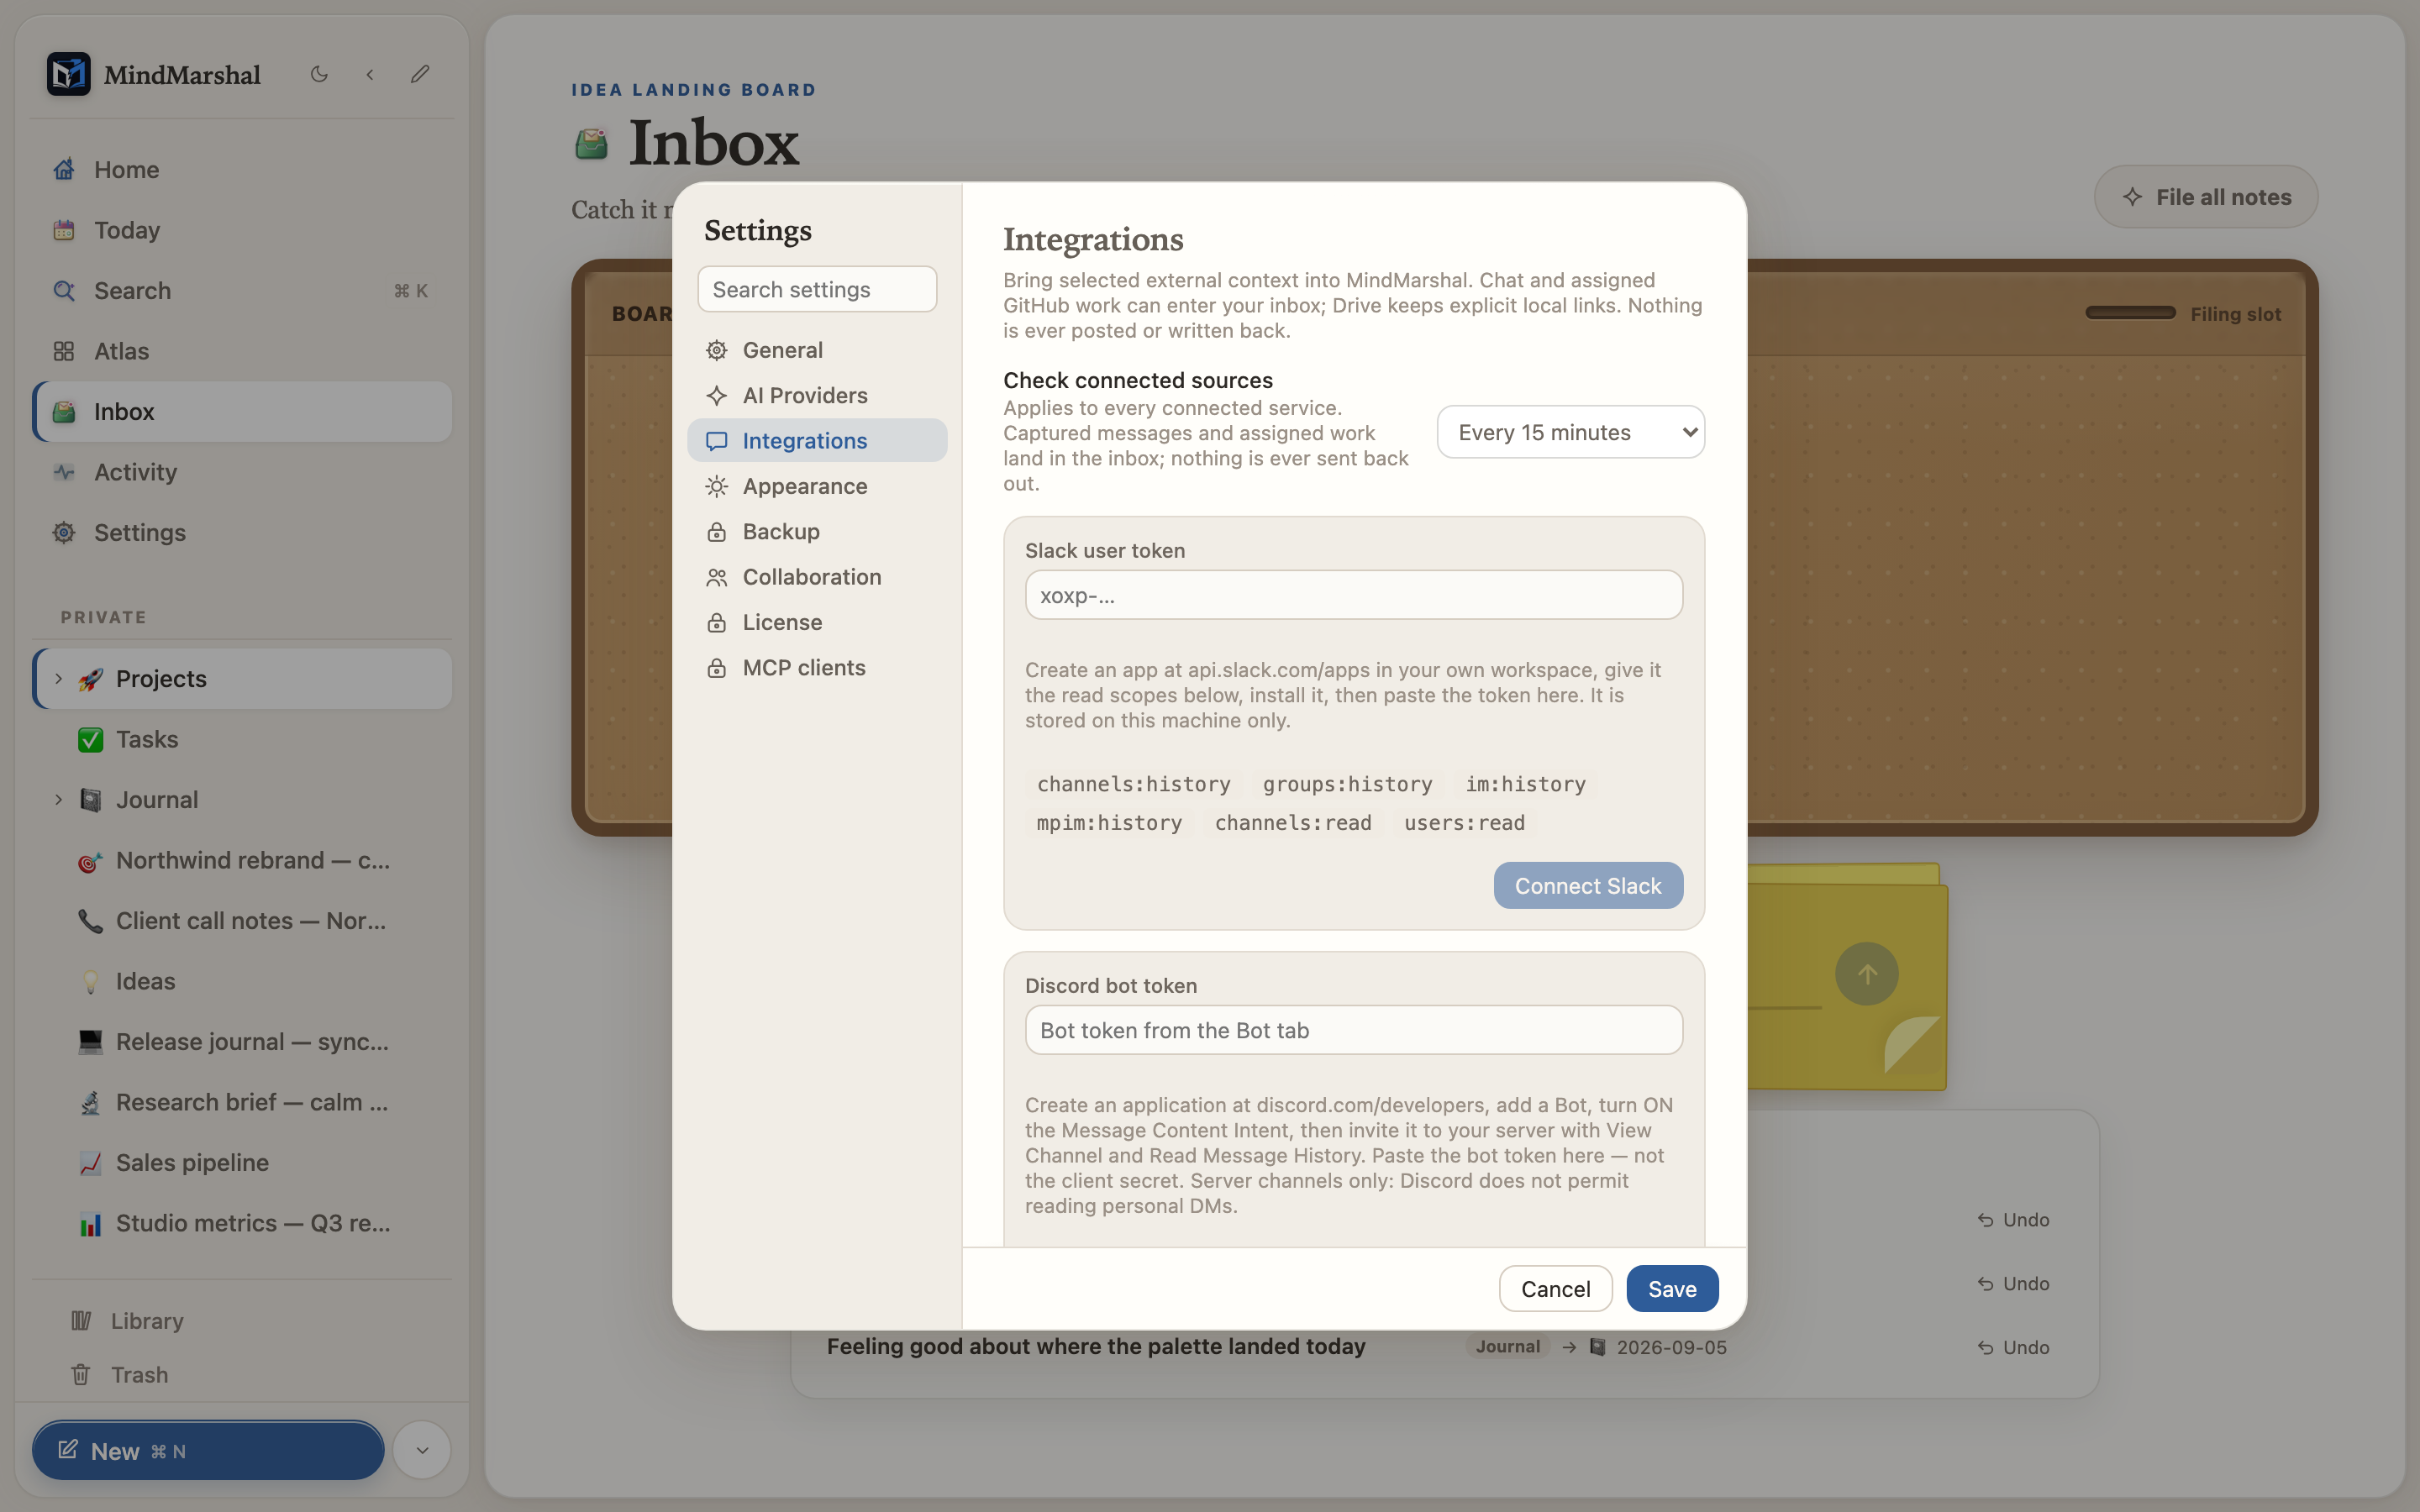
Settings → IntegrationsCapture in, never out. Token and permission details for each provider
Slack: create an app at api.slack.com in your own workspace, give it the read scopes listed on screen (
channels:history,groups:history,im:history,mpim:history,channels:read,users:read), install it, and paste the user token. Because nothing is ever posted back, no write scope is required.Discord: create an application at discord.com/developers, add a Bot, turn on the Message Content Intent, then invite it to your server with View Channel and Read Message History. Paste the bot token, not the client secret. Only server channels the bot can see are readable; personal DMs are never accessible.
GitHub: use Sign in with GitHub for one-click connection when it is available in your build, or paste a fine-grained personal access token limited to the repositories you want Mind Marshal to use. Capture-in needs read-only Metadata, Issues and Pull requests permissions. The editor’s Push code action additionally needs Contents read and write, and commits one file through GitHub’s Contents API only after you press it.
Google Drive selected-file links: in builds configured with Google Drive support, choose files in Google's system-browser Picker. Mind Marshal requests exactly the
drive.filescope, stores OAuth tokens in the operating system credential store with local SQLite fallback when that store cannot accept or return the credential, and keeps local metadata for selected files. It uses DriveGETrequests only; it never uploads, edits, moves, deletes, shares, organizes Drive files, syncs your whole Drive, or imports a workspace. Refresh is manual, not part of the 15-minute capture schedule. Production builds needMINDMARSHAL_GOOGLE_DESKTOP_CLIENT_IDat compile time and Google Drive plus Picker APIs enabled; there is no client secret and no Mind Marshal server.Once connected, choose which channels to subscribe to. New messages arrive as inbox items ready for triage.
-
Check workspace health before you need recovery
Open Settings → Health & recovery for a read-only integrity check, workspace size, backup freshness, and any scheduled-backup failure. The check does not rewrite the workspace merely to report its condition.
Recovery is preview-first. Select an encrypted backup, unlock it locally, and inspect what will be restored before confirming. When a restore proceeds, Mind Marshal keeps the replaced workspace rather than silently deleting the only previous copy.
The in-app recovery guide also explains emergency handling of the SQLite database and its companion
-waland-shmfiles. Copy that complete set while the app is closed. Never email a workspace or backup to support unless you have deliberately removed private content.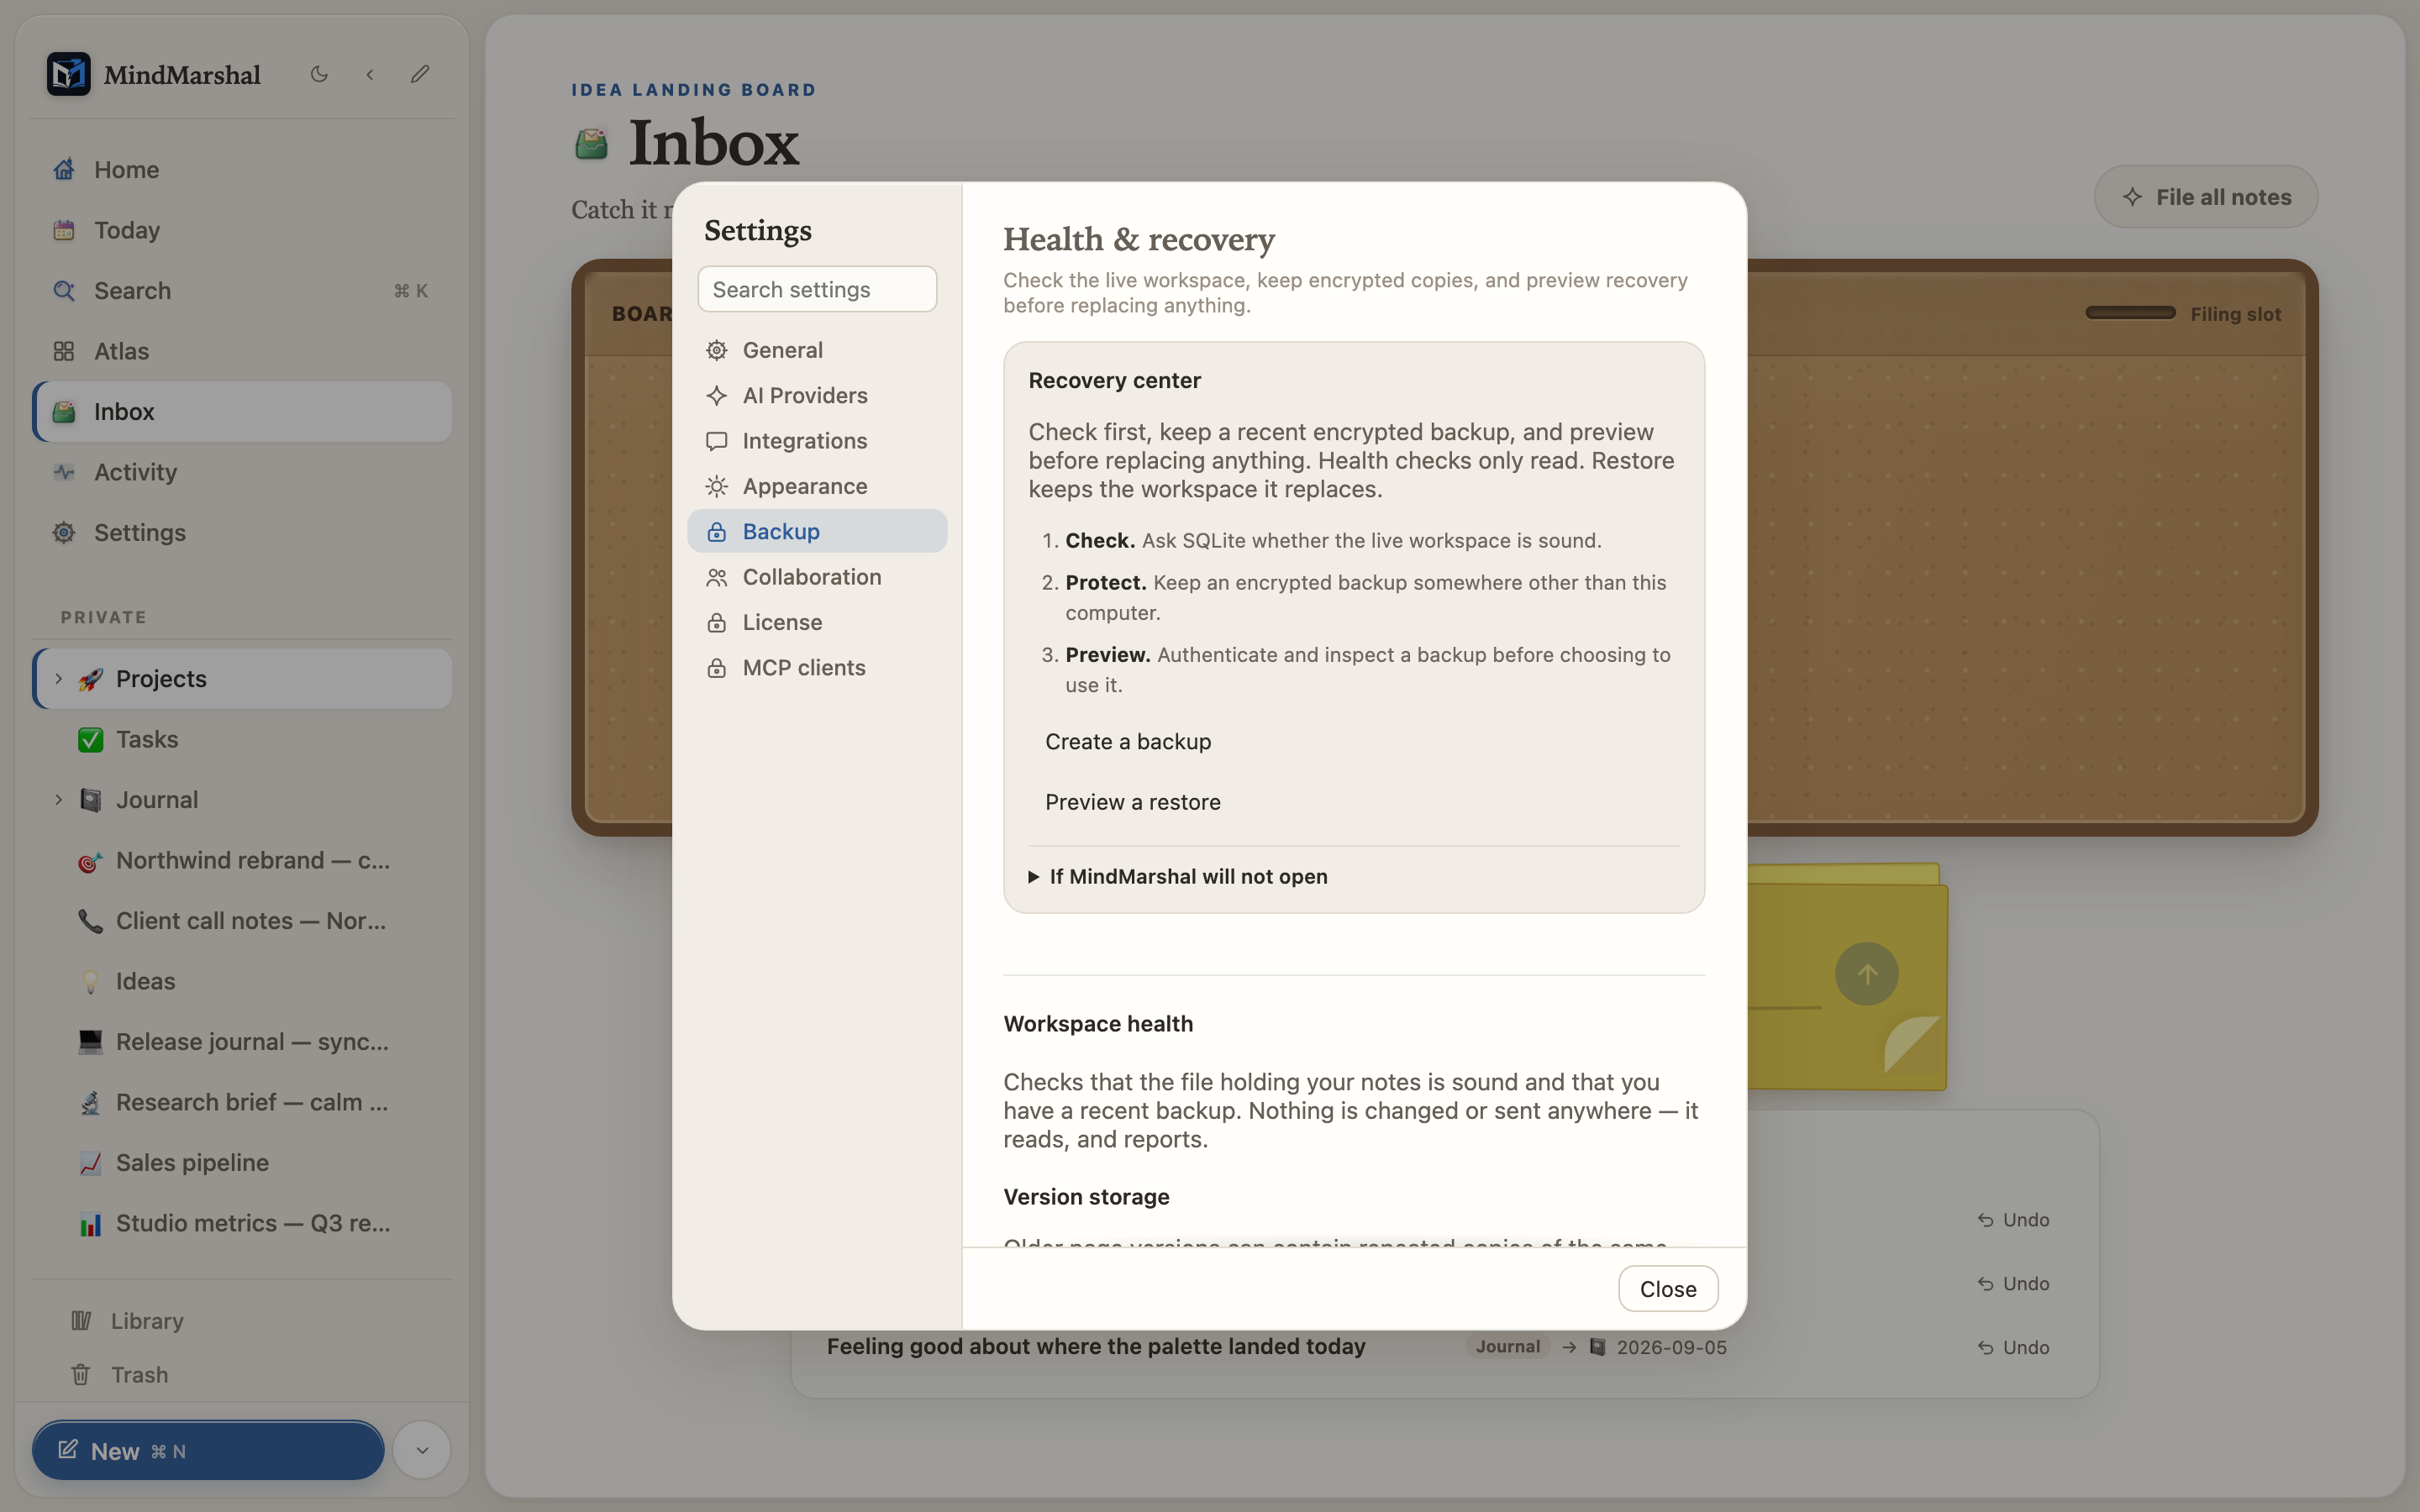
Health & recoveryCheck first, preview restore, and preserve the workspace being replaced. -
Make an encrypted backup
Your entire workspace is one file on your computer. Open Settings → Backup, choose Create a backup, and set a passphrase. The archive is encrypted with AES-256-GCM using a key derived from your passphrase with Argon2id, so it stays private even in cloud storage or on a USB stick.
Settings → BackupCreate and restore, with an honest warning about the passphrase. Store the passphrase separately from the backup file. Without it, neither the app nor the publisher can open the archive. That is the point of the design, and there is no recovery path.To restore, choose Restore from a backup and pick the
.mmbackupfile. The restore is staged and applied at the next launch, and the workspace it replaces is kept under a timestamped name, so a restore chosen by mistake can be undone.This is also how you move your workspace to another Mac: back up on the old machine, restore on the new one.
-
Trial, license, and what happens if it lapses
The full local workspace is free with no account or time limit. The 14-day trial unlocks AI and automation, the Pro features, with no email address required. To keep Pro, buy a $29 license and paste the key into Settings → License. One purchase covers up to three of your own machines; deactivate a machine to free its seat.
If the trial or Pro license lapses, AI and automation return to the Free limits. The local workspace stays editable, searchable and exportable. Your data is never held hostage.


Troubleshooting
| Situation | What to do |
|---|---|
| AI says it is not configured | Open Settings → AI Providers, select a provider, choose a model, and press Test connection. A provider with no model selected cannot run. |
| A connected source captured nothing | Confirm you selected at least one channel or repository. For Discord, Message Content Intent must be on. For GitHub, the token needs read access and items must be open and assigned to the connected user. |
| The calendar card is empty | macOS permission is per-app. Choose Show my calendar and approve the prompt; if you dismissed it, re-enable Mind Marshal under System Settings → Privacy & Security → Calendars. |
| A restore did not appear | Restores are applied at the next launch by design. Quit and reopen the app. |
| You lost a backup passphrase | The archive cannot be opened by anyone, including the publisher. Use your live workspace and create a fresh backup with a passphrase you record safely. |
| AI or automation is unavailable | The Pro trial or license period ended. Your local workspace remains fully editable; add a license key in Settings → License to restore Pro features. |
Still stuck? The support page explains what information helps a support conversation without exposing your workspace, backup, API key, or sign-in token.